This overview provides the steps needed to customize the relative time calendars that are built into Cognos data modules. These IBM-supplied calendars, included since version 11.1, have been one of the platform’s most useful features. They make it easy to do common comparisons like Year-Over-Year (YoY) and Month-to-Date sales vs. Month-to-Date sales last year. But there will be times when you need a time comparison that goes outside what is provided by the built-in functionality. Follow these steps to expand the basic functionality to incorporate your required comparison dates.
Implementing base relative time measures
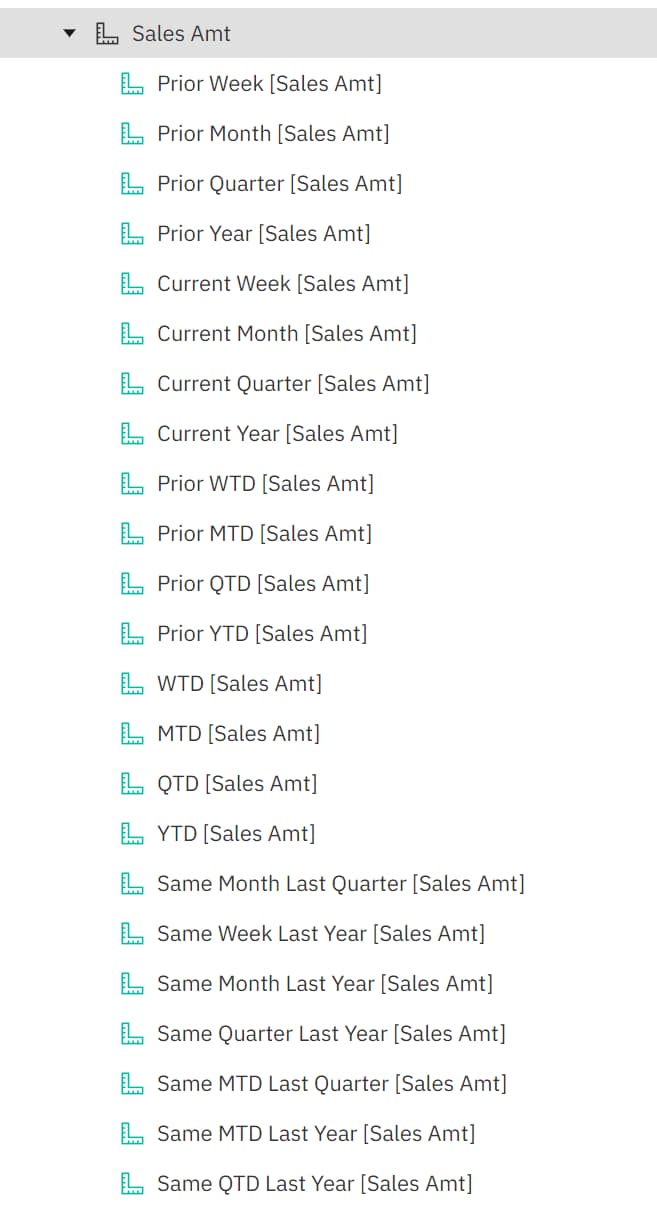
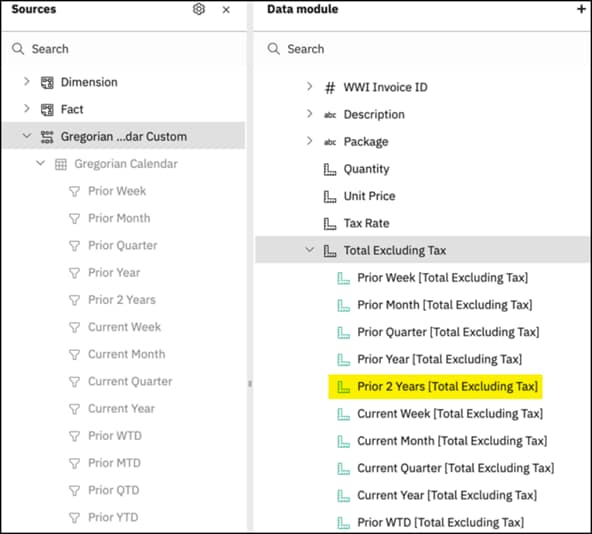
To enable relative date analysis in Cognos Analytics, link a supplied Gregorian or Fiscal calendar data module into an existing data module. From there you can easily create measures and filters that automatically produce the relative time analyses shown in the image on the right. (Watch our on demand webinar to see how to implement the initial configuration.)
Customizing relative time analysis in Cognos Analytics
The built-in calendars only include measures and filters to allow Current Year vs. Prior Year comparisons. What happens if you need a relative time comparison outside that range? For example, what if you want to compare Current Year vs. 2 years prior? Or 3 years prior? During the pandemic, comparisons to 2020 were not as useful as comparisons to 2019.
We will show you the steps for creating a custom calendar that will support a new relative time analyses (2 years prior). Based on this example, you should be able to extrapolate other custom comparisons like 3 years prior.
Breaking down the process into five steps looks like this:
- Create a new calendar CSV file from the Cognos supplied calendar generator tool.
- Download the new calendar file and add a new column that will store the prior 2 year date. Fill the new column with dates that are 2 years prior.
- Upload the resultant CSV file into Cognos.
- Relink the existing Gregorian calendar data module to the new CSV file.
- Create a new P2Y filter with modified P2Y script.
Let’s go into each step in detail.
Step 1. Create a new calendar CSV file
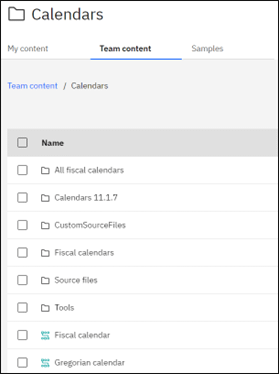
The Gregorian calendar data module is included with the default installation of Cognos. You will find it here: Team Content > Calendars folder.
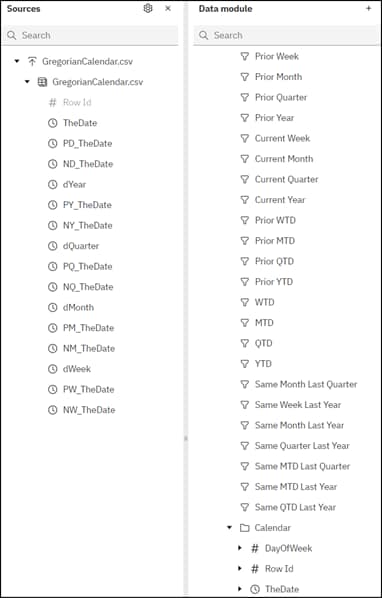
When you open this data module, you will see it links back to a CSV file and contains various time dimension type fields.
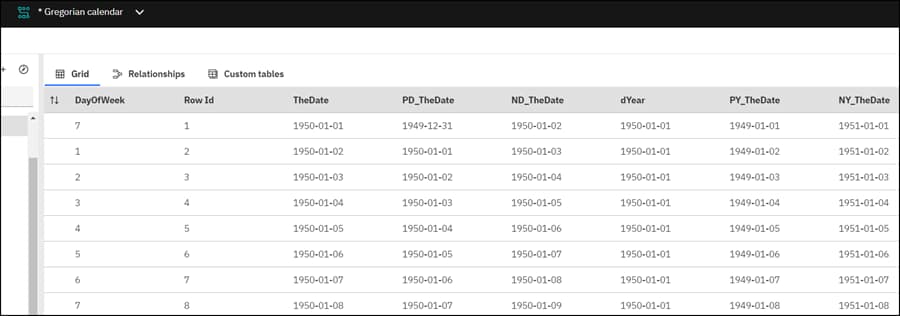
Below are sample rows that are contained in the data module:
As you can see, the fields are easy to decipher. The key field is the TheDate field. All the other relative time-based fields are based on this key field.
The linked Gregorian calendar CSV file is what will be modified; the new file will be linked back into this data module.
Run the calendar generator report:
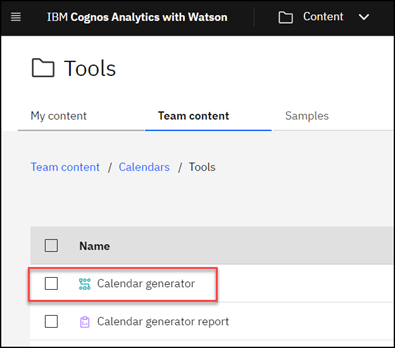
IBM provides a calendar generator report in the Tools folder (shown below). We can run this report and create our own version of the CSV file that we will modify:
- Click Calendar generator report.
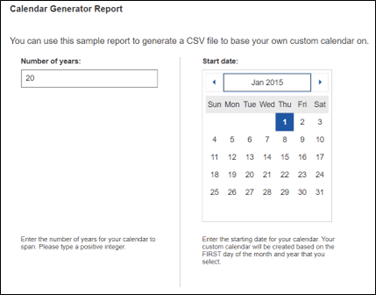
- Supply the Number of years and a Start date. In the example below, we show running a calendar for 20 years.
- Click Finish and let the report run.
Step 2. Download the new calendar and fill in dates that are to 2 years prior
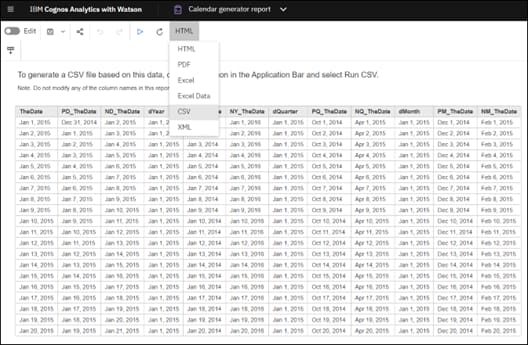
After the report has run, you can export the report to a CSV file that will download to your desktop, where you can modify it. Click Run CSV to download the file.
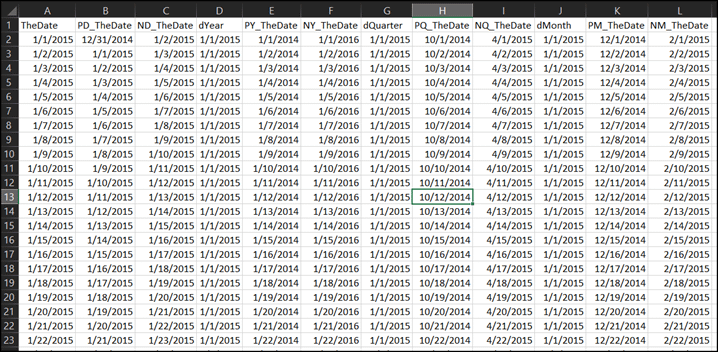
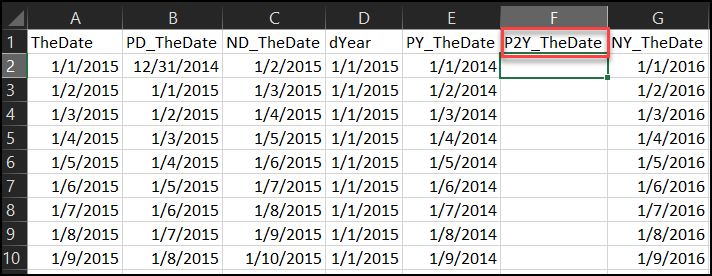
Open the downloaded CSV file in Excel. It should look like this:
If you explore the data in the file, you will note that the first row begins with the start date you entered in the prompt. The very last row will correspond to the last year, N number of years in the future. We can modify this file with additional columns that we will use to create new relative slices.
Add a column that will support a 2 year prior relative time calculation. This column will be offset 2 years from the TheDate column in the CSV file. This column will be used later to create a filter calculation for creating 2 years prior measures.
- Insert a column to the right of PY_TheDate.
- Call the new column P2Y_TheDate.
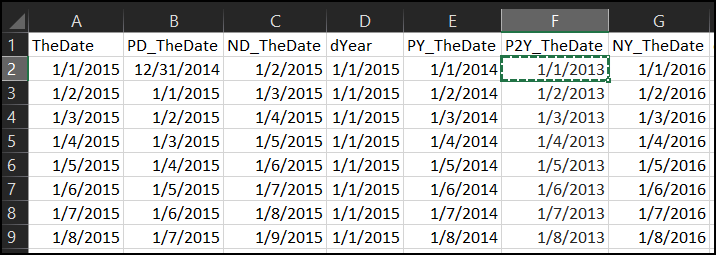
- Populate all the rows in this column with a date that is 2 years prior to the TheDate. For example, the first row has 1/1/1990 as the TheDate value; therefore, the value of the P2Y_TheDate column should be 1/1/1988.
The following Excel formula is one way to accomplish this task. (If you want to do 3 years prior, replace the -2 with a -3.)
=DATE(YEAR(A2)-2,MONTH(A2),DAY(A2))
- Paste this formula into the blank column. Then copy and paste this formula for the rest of the data. Your CSV file will now look like this:
Step 3. Upload the modified CSV file into Cognos
After you have modified the CSV file, upload the file into your Cognos environment.
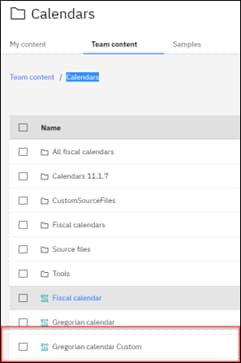
Cognos provides a Gregorian calendar data module. You can use this data module or make a copy of the Gregorian calendar data module that will contain the custom calendar.
In this example, we have made a copy of the base Gregorian calendar data module and called it Gregorian calendar Custom.
Step 4. Relink the existing Gregorian calendar data module to the new CSV file
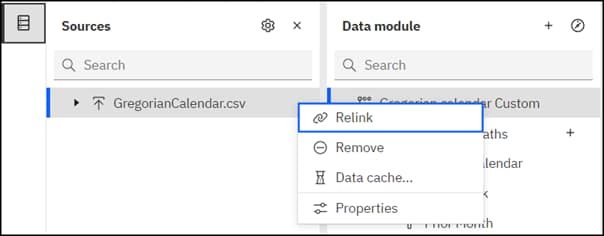
Make changes to the data module by relinking the new uploaded CSV file to this data module.
- Open the Gregorian calendar data module you want to modify.
- Relink the source CSV file to the newly uploaded CSV file.
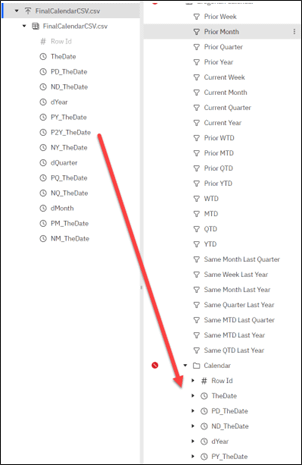
- Add the new P2Y_TheDate column to the data module’s list of fields. This allows us to create a new filter. To do so, drag the source CSV file to the top root of the data module. The fields will be refreshed and the new column will be added to the bottom of the list.
Step 5. Create a new P2Y filter with modified P2Y script
With the new field and data now added to the data module, we can add a new filter calculation. It will leverage the P2Y field data and allow us to create 2 years prior measures when the modified Gregorian calendar is linked in other data modules.
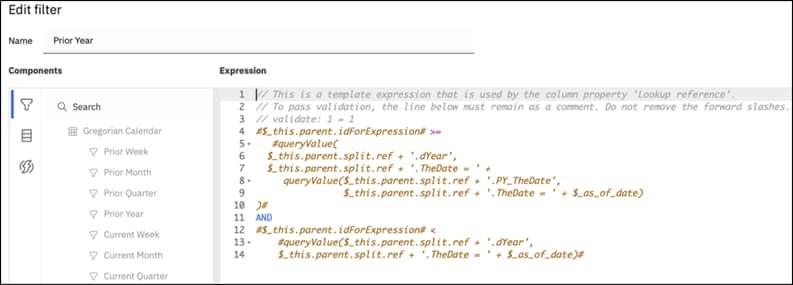
When adding new filter calculations, it is best to look at existing filter calculations to understand the existing syntax and logic. The Prior Year filter calculation is the most similar to what we are trying to accomplish. The filter calculation is shown below.
The expression in this formula creates a BETWEEN statement. One of the first comment lines // validate: 1 = 1 is required to be there and sets up the rest of the expression.
The BETWEEN statement is saying “filter for any dates greater than or equal to a lower bound expression AND less than or equal to the upper bound expression.” The $_this.parent.idForExpression evaluates to the date column that has been established as the lookup reference pointing to your calendar.
As with any coding example, you need to go through a couple of iterations to get the right syntax working.
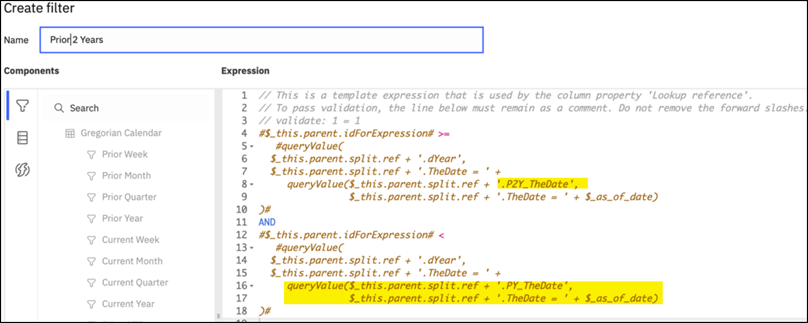
Now we are going create a new filter called Prior 2Years. It will look like the screen shot below.
If you study the new calculations, you will note we are referencing the new P2Y_TheDate field in the lower bound expression and then changing the upper bound expression to get the correct logic.
Save the module. You are now ready to link this in other data modules.
This article was contributed by Pedro Ining, Senturus Senior Business Analytics & Data Warehouse Architect, who has presented numerous webinars on Cognos data modeling and data modules. See more articles on Cognos data modeling and data modules in our Knowledge Center. Data prep and modeling are crucial for nimble, accurate reporting. Senturus can help you build performant data models (in Framework Manager, data modules or a combination of both) that enable self-service and speed report development. Let us know if you need a hand.
