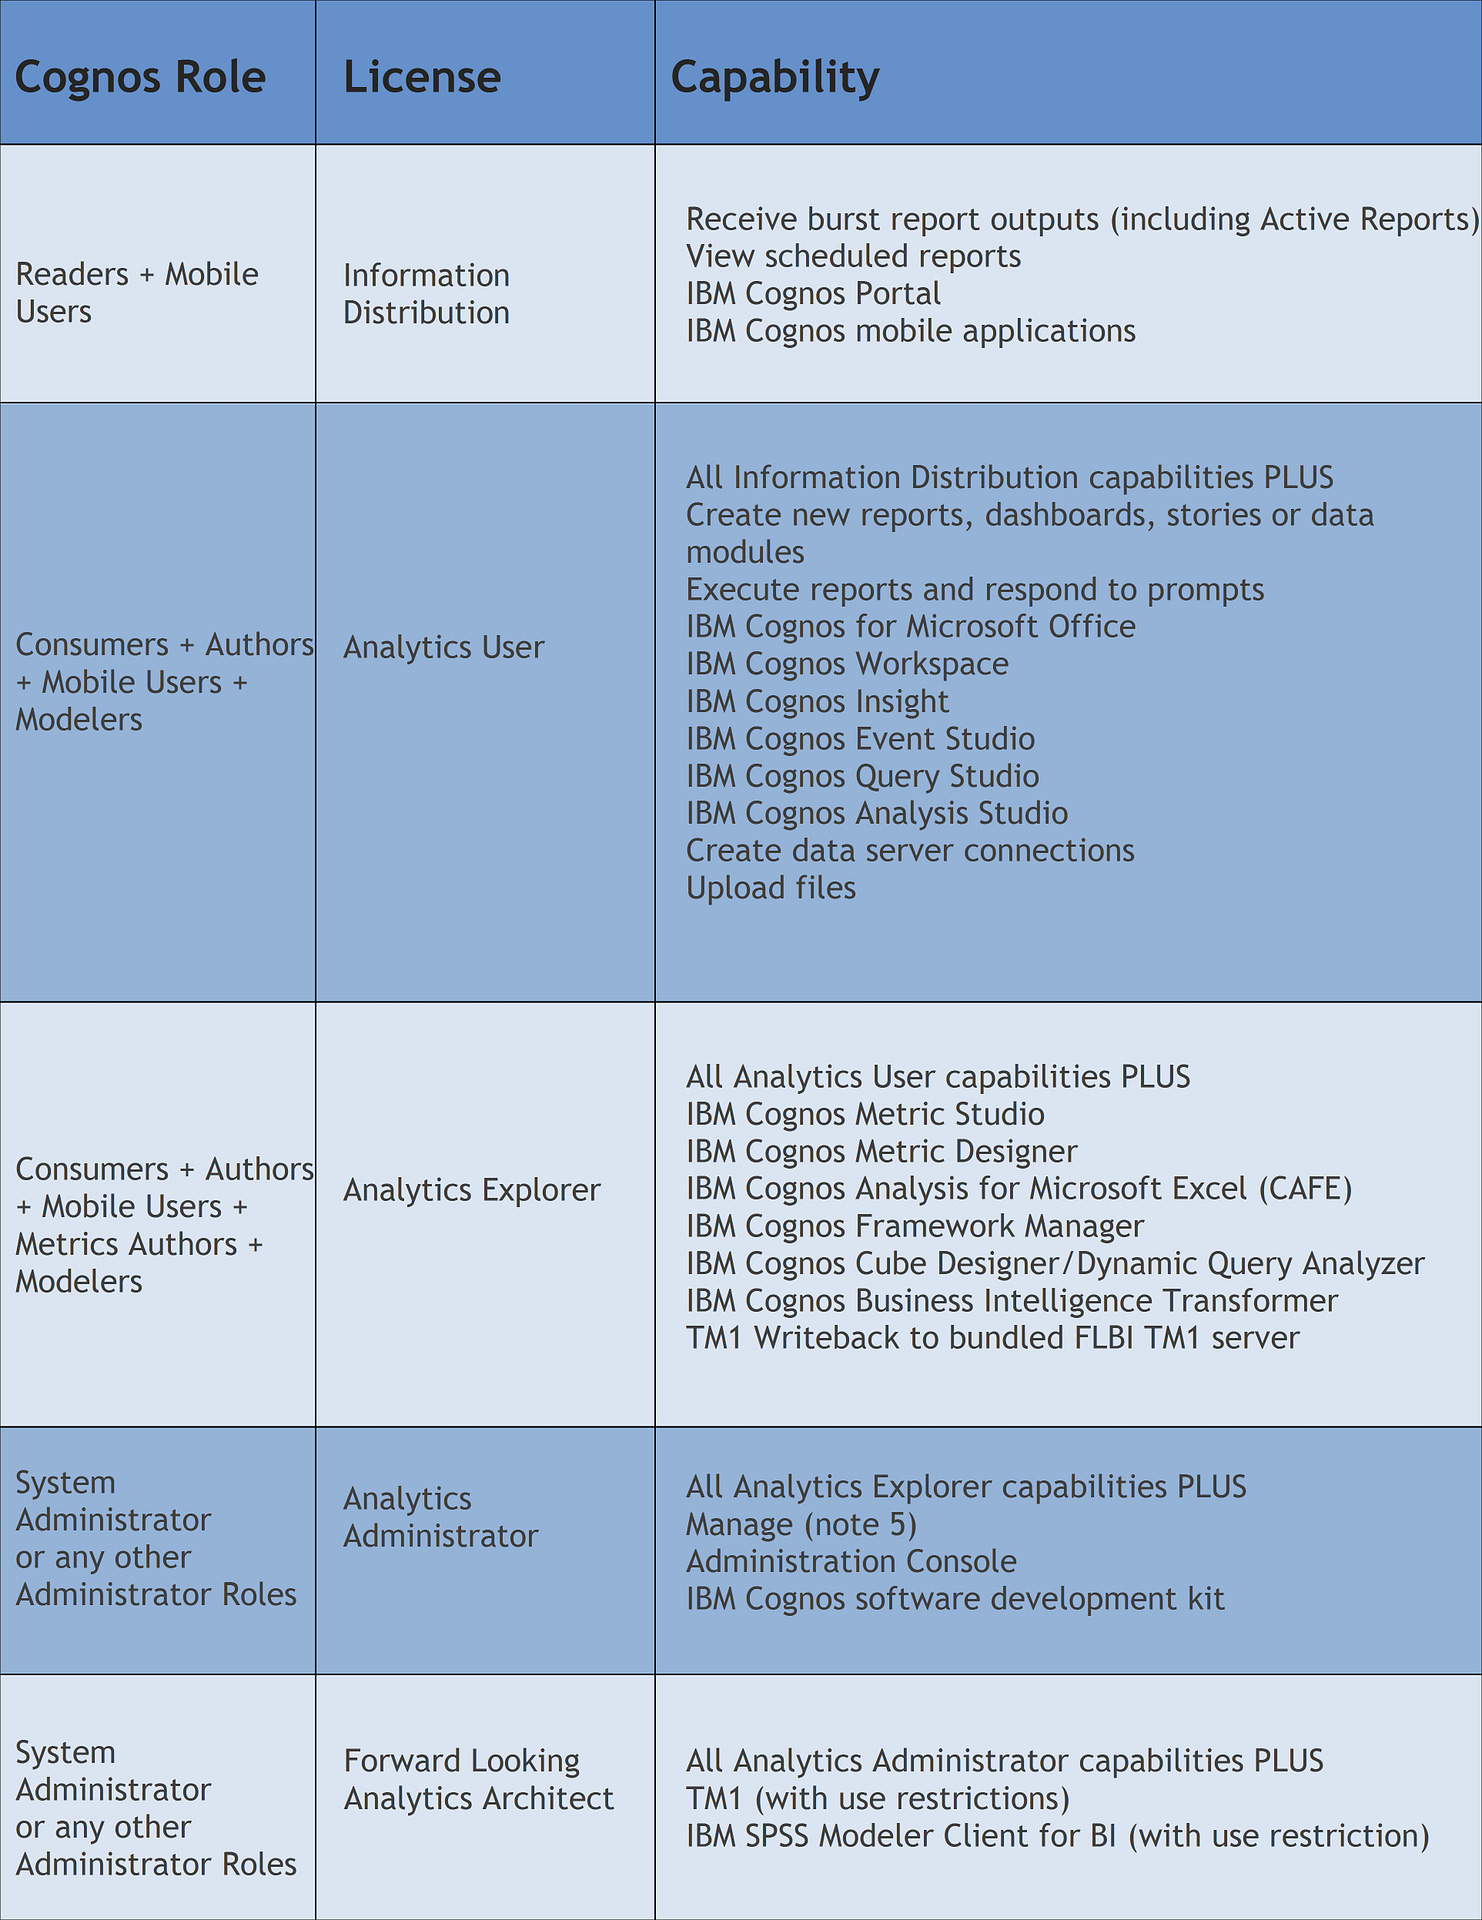
Cognos Analytics contains some new and exciting license roles. These roles have specific entitlements that can be used to set up capabilities and permissions. We’ll take a look at the roles and then go through the steps to set up and configure these entitlements.
New roles and associated capabilities

Setting up Cognos configuration
The first step to enabling these entitlements is setting up Cognos Configuration. On your main dispatcher, open up Cognos Configuration and go to the Security tab on the left side. Click on Authentication.
Here you will set the value of Restrict access to members of the built-in namespace to True. This will exclude any roles or security profiles from third party authentication sources that are not explicitly part of the Cognos namespace groups or roles. Save the configuration and restart the service.
Creating the analytics administrator role
With configuration taken care of, you can move on to creating the Analytics Administrator role in Cognos Analytics portal. Log in to your Cognos Analytics system with an administrator account and from the Welcome page go to Manage – Accounts and select the Cognos namespace. Under the Members tab of the System Administrator role, click on the Add Member button and add your group or user from your namespace.
Now you need to remove Everyone from this group. It is very important to remove Everyone after adding yourself to the administrator membership. Doing it before will lock out the system and not allow any further changes to be made. Click the minus button next to Everyone to remove it.
Cleaning out everyone
The above steps of removing Everyone need to be done in multiple locations. By default, the Everyone profile is in a number of memberships. This is to ensure when the system is first brought online, you can get to the different tasks and capabilities without error.
Everyone needs to be removed from the membership of the following:
|
|
Adding the user roles
Your Analytics Explorer and Analytics User roles need to be a member of a number of roles as per the matrix above. Log on to the system with an account in the Analytics Administrator role (the one you just set up above) and like before, from the Welcome page, select Manage – Accounts. Select Authors from the Cognos namespace and select the Members tab. Click the Add Member button and add the appropriate users or groups to the role.
Repeat these steps to add groups or users in the Analytics Explorer or Analytics User licensed role to the following:
- Consumers
- Metric Authors (Analytics Explorer only)
- Mobile Users
- Modelers
The information distribution role
The final role you need to address is the Information Distribution role. This one has an additional challenge as you need to manually set some capabilities as well as adding it to memberships.
While still logged in as an Administrator, locate the Readers role and go to the Members tab. Click the Add Member button and add in the Information Distribution groups or users. Repeat this step to add them to the Mobile users role as well.
The extra bit for this license involves changing their capabilities. For this you need to launch the Administration Console. Click Manage – Administration Console and click on the Security tab. From here, click Capabilities. Scroll down until you see Executive Dashboard and click the down arrow for Set properties. Under Permissions, click Add. Navigate to the appropriate groups or users and move them over to the selected entries and click OK. In the Permissions window, click the groups or users and select Deny for execute and traverse.
Repeat the steps for the capabilities of:
- Web-based modeling
- Upload files
- Dashboard
Conclusion
By taking the time to follow these steps and set up your system from the outset, you are making future maintenance easier. Most important, your system is now in full alignment with the licensed roles as put forth in Cognos Analytics and you won’t have to worry about your users being in compliance with any licensing issues.


